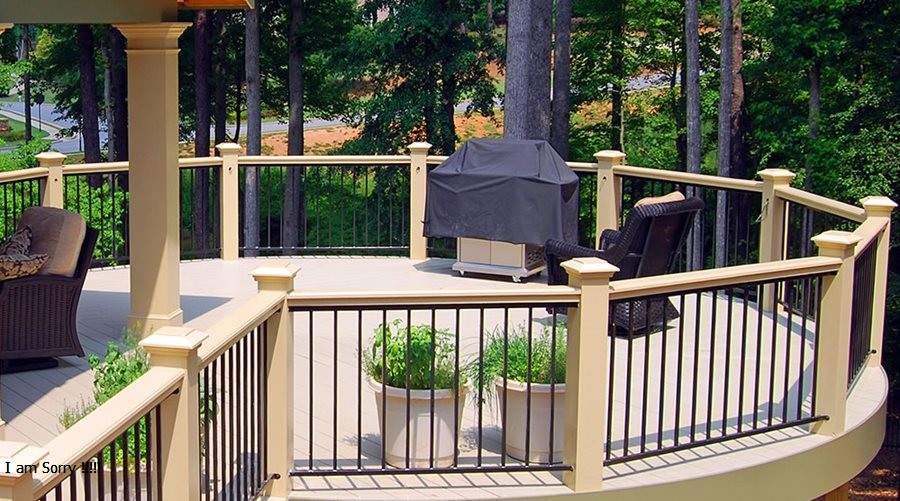
Metal railings serve as an essential architectural feature, offering safety, durability, and aesthetic appeal to homes, commercial properties, and public spaces. Whether you’re enhancing a staircase, balcony, deck, or outdoor walkway, properly installed metal railings can elevate the functionality and style of any area. This guide provides a detailed overview of metal railings installation, covering materials, tools, methods, and tips to ensure a professional result.
Benefits of Metal Railings
- Durability: metal railings installation especially those made of steel, iron, or aluminum, are robust and resistant to wear, weather, and impact.
- Aesthetic Versatility: Available in various designs, from ornate iron patterns to sleek modern aluminum, metal railings can complement any architectural style.
- Low Maintenance: When coated or galvanized, metal railings resist rust and corrosion, requiring minimal upkeep.
- Safety: Metal railings provide sturdy support and prevent falls, making them ideal for staircases, balconies, and elevated walkways.
Types of Metal Railings
- Steel Railings:
- Strong and durable.
- Ideal for both indoor and outdoor use.
- Can be powder-coated for corrosion resistance.
- Wrought Iron Railings:
- Known for their decorative and elegant designs.
- Suitable for traditional and vintage aesthetics.
- Aluminum Railings:
- Lightweight and rust-resistant.
- Perfect for coastal and humid climates.
- Cable Railings with Metal Frames:
- Provide a modern, minimalist look.
- Allow unobstructed views, especially in outdoor settings.
- Glass and Metal Combinations:
- Combine the strength of metal with the transparency of glass.
- Commonly used in contemporary designs.
Tools and Materials Required
- Tools:
- Measuring tape
- Drill and drill bits
- Screwdrivers
- Level
- Angle grinder (for cutting metal)
- Welding equipment (if required)
- Wrenches
- Safety gear: gloves, goggles, and ear protection
- Materials:
- Metal railing components (posts, balusters, handrails)
- Fasteners (screws, bolts, anchors)
- Mounting brackets
- Protective coatings (paint, powder coat, or sealant)
- Concrete or wooden anchors (for securing railings)
Step-by-Step Installation Process
- Planning and Preparation:
- Measure the installation area precisely.
- Choose a railing design and material that suits your needs.
- Check local building codes and regulations to ensure compliance.
- Gathering Materials:
- Purchase high-quality materials and ensure all components fit the design.
- If using pre-fabricated railing kits, double-check that all parts are included.
- Marking and Measuring:
- Use a measuring tape and level to mark post positions accurately.
- Ensure equal spacing between balusters for uniformity.
- Installing Posts:
- Secure posts to the base using bolts or anchors.
- For concrete bases, drill holes and use masonry anchors.
- For wooden bases, use heavy-duty screws and wood anchors.
- Attaching Balusters and Rails:
- Connect balusters to the posts using brackets or direct fastening.
- Attach the handrail to the top of the balusters.
- Ensure all components are level and aligned.
- Securing the Railings:
- Tighten all fasteners and check for stability.
- Weld joints for additional strength if using steel or iron.
- Finishing Touches:
- Apply protective coatings to prevent rust and corrosion.
- Clean the railing to remove debris and fingerprints.
Tips for a Successful Installation
- Check Local Codes: Regulations often dictate railing height, spacing, and load-bearing requirements.
- Use High-Quality Fasteners: Invest in rust-resistant screws and bolts to ensure long-lasting durability.
- Consider Professional Help: For intricate designs or welding tasks, hiring a professional can ensure a flawless result.
- Safety First: Always wear protective gear and use tools correctly to prevent injuries.
- Test Stability: After installation, apply pressure to test the strength and stability of the railings.
Common Challenges and Solutions
- Uneven Surfaces:
- Use adjustable brackets to accommodate uneven flooring.
- Shim posts to maintain level alignment.
- Rust and Corrosion:
- Opt for galvanized or powder-coated metals.
- Regularly inspect and touch up any damaged coatings.
- Complex Designs:
- Pre-fabricated kits can simplify the process for intricate patterns.
- Custom fabrication may require professional expertise.
- Limited Tools:
- Rent specialized tools, such as angle grinders or welding equipment, if not readily available.
Maintenance and Care
To maximize the lifespan and appearance of your metal railings:
- Regular Cleaning: Wipe down railings with a damp cloth and mild detergent.
- Inspect for Damage: Periodically check for loose fasteners, rust spots, or scratches.
- Apply Protective Coatings: Reapply paint, powder coat, or sealant as needed.
- Lubricate Moving Parts: For railings with hinges or joints, use a suitable lubricant.
Why Choose Metal Railings?
Metal railings stand out for their combination of strength, beauty, and adaptability. Whether you’re seeking a classic wrought iron look or a sleek modern aluminum design, metal railings offer endless possibilities to enhance your property. With proper installation and care, they provide a secure and stylish solution that lasts for decades
Investing time and effort into the installation process ensures not only the safety and functionality of your metal railings but also their aesthetic appeal. Whether you tackle the project yourself or hire a professional, following these guidelines will lead to a successful and satisfying result.
