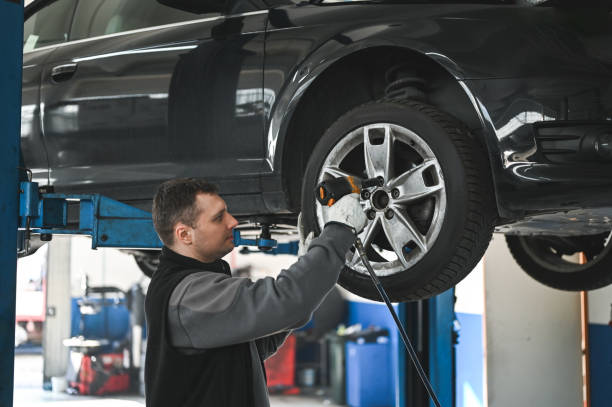
In this post, I’ll walk you through how to install wheel spacers on your vehicle safely and effectively. Whether you’re aiming for a wider stance for better handling, more aggressive aesthetics, or simply accommodating bigger brakes, wheel spacers are a smart mod—when done right.
1. Why Install Wheel Spacers?
Wheel spacers provide more clearance between the wheel hub and the wheel itself. This can:
-
Improve handling and cornering by widening your stance
-
Allow installation of larger brake calipers
-
Enhance appearance with flush, aggressive wheel fitment
-
Offer better clearance for off-road tire rub
2. Gather Your Tools and Parts
To install wheel spacers properly, you’ll need:
-
Vehicle-specific wheel spacers (ensure matching bolt pattern and hub-centric design)
-
Torque wrench (range up to 100 ft-lb or as per spec)
-
Socket set and breaker bar
-
Jack and jack stands, plus wheel chocks
-
Loctite (medium-strength blue preferred)
-
Anti-seize compound (optional)
-
Gloves and a clean rag
Proper preparation ensures safety and longevity of the install.
3. Preparing Your Vehicle
-
Park on level ground and apply the parking brake.
-
Loosen lug nuts slightly while the car is still on the ground—just a few turns, not fully off.
-
Lift the vehicle with a jack, then use jack stands for safety.
-
Remove the wheel entirely to expose the hub.
4. Clean Everything Well
Clean the hub and wheel mounting surfaces thoroughly—remove any rust, dirt, or debris with a wire brush or rag. A clean, smooth surface is essential to prevent vibration and ensure proper torque.
5. Prepping the Spacer
If using anti-seize, apply a thin, even coat to the hub-facing surface of the spacer to prevent corrosion and make future removal easier. Apply medium-strength Loctite to the studs or bolts that go into the wheel panel—this helps maintain torque under stress and road vibration.
6. Installing the Spacer
-
Align the spacer with the hub and slide it on. It should sit flush—any gaps or wobbles indicate a misfit or debris still present.
-
Hand-thread the lug nuts or bolts onto the spacer—don’t force if there’s misalignment.
-
Torque in a star pattern gradually (in three stages: 20%, 60%, 100%) until reaching the manufacturer’s specification—commonly 80–100 ft-lb depending on the spacer and vehicle.
-
Let it rest for a few minutes, then re-torque to spec.
7. Re-mounting the Wheel
Once the spacer is on snugly, re-mount the wheel and hand-thread lug nuts onto the exposed threads. Lower the vehicle until the wheel just touches the ground (not full weight), then torque the lug nuts in a star pattern to your vehicle manufacturer’s spec (e.g., 100–120 ft-lb). Finally, lower the vehicle fully and perform a final torque check.
8. Post-Installation Checks
-
Short Test Drive: Drive gently for 5–10 miles, then re-check torque on both spacer lug nuts and wheel nuts.
-
Look for Vibrations: If you notice shaking, re-inspect for cleanliness and proper seating.
-
Regular Maintenance: Keep an eye on torque during oil changes or long trips—wheels and spacers can slightly shift over time.
9. Common Mistakes to Avoid When Installing Wheel Spacers
Even though learning how to install wheel spacers is straightforward, small mistakes can lead to big problems. One of the most common errors is choosing the wrong size or thickness of spacers, which can affect wheel alignment and cause rubbing. Another issue is failing to clean the hub and spacer surfaces thoroughly, leading to uneven fitting and vibration. Over-tightening or under-tightening the lug nuts can also create dangerous driving conditions. Always follow the manufacturer’s torque specifications and double-check your work. Avoiding these common mistakes ensures both safety and performance.
10. How to Maintain Wheel Spacers for Long-Term Safety
Installing spacers is only the first step—regular maintenance keeps your wheels safe and secure. After installation, re-torque the lug nuts and spacer bolts after 50–100 miles to ensure nothing has loosened. Inspect the spacers every time you rotate or replace tires, checking for signs of corrosion, cracks, or wear. Clean the contact surfaces periodically to prevent dirt buildup that can lead to vibration issues. Following these maintenance tips ensures your wheel spacers stay in excellent condition and continue to perform effectively over time.
Quick Tips & Warnings
Safety First: Always use jack stands—not just the jack—and work on a flat surface to prevent accidents.
Be Precise: Proper torque is vital. Under-tightening can cause wobble; over-tightening may warp studs or damage threads.
Proper Fitment: Make sure spacers are hub-centric (not just lug-centric) to avoid alignment and vibration issues.
Legal and Warranty Considerations: Check local laws—some regions regulate spacer width. Also, verify whether using spacers impacts your vehicle warranty
Final Thoughts
Installing wheel spacers isn’t rocket science—how to install wheel spacers boils down to using the right hardware, cleaning and fitting carefully, and applying proper torque in stages. The result can be a more aggressive look, firmer handling, and accommodation for bigger brakes—all while maintaining ride quality.
With this step-by-step guide, you’re well-prepared to tackle the job safely. Let me know if you’d like images, additional visuals, or references to torque specs for specific makes and models!
