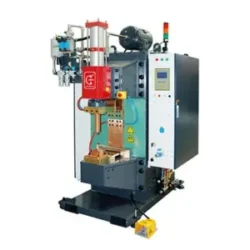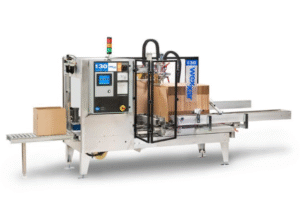
The Wexxar Shaft 21-046 is an essential component used in various case erectors and packaging systems within the Wexxar family of machines. As part of the internal mechanical drive system, this shaft supports smooth motion, consistent timing, and reliable performance. Whether you’re replacing a worn part or upgrading your equipment, installing the 21-046 correctly is critical to maintaining productivity and preventing unnecessary downtime. Many technicians preparing for this replacement also explore reliable Wexxar Packaging resources and high-quality packaging equipment and parts to keep their machinery running at peak efficiency.
Below is a comprehensive, operator-friendly installation guide to help ensure proper alignment, safety, and long-term performance.
Step 1: Power Down and Secure the Machine
Before working on any internal component, safety comes first.
Disconnect All Power Sources
Turn off the machine completely and unplug it from its power supply. For automated lines, also shut down upstream and downstream equipment to avoid accidental motion.
Follow Lockout/Tagout (LOTO) Procedures
Attach proper lockout devices to prevent accidental activation during maintenance. Only trained personnel should perform this step.
Allow Moving Parts to Come to Rest
Ensure belts, rollers, and any internal drives have fully stopped before proceeding.
Step 2: Access the Internal Assembly
The Wexxar Shaft 21-046 sits inside the drive mechanism, so you’ll need clear access.
Remove Safety Guards
Use the correct tools to remove any protective shields or covers. Place screws and panels aside in an organized manner.
Identify the Existing Shaft
Locate the current shaft within the drive assembly. Refer to your machine manual if needed—Wexxar machines label internal parts clearly.
Step 3: Remove the Old Shaft Safely
Taking out the existing shaft requires careful attention to alignment and supporting components.
Loosen Set Screws or Retaining Bolts
The shaft is often held in place by couplers, collars, or gear mounts. Use the appropriate tools to loosen these without forcing them.
Support Adjacent Components
Some parts—such as gears, rollers, or timing pulleys—may shift when the shaft is removed. Support them by hand or with small blocks.
Slide Out the Old Shaft
Gently pull the shaft from its housing. If resistance occurs, check for missed screws or misalignment rather than applying excessive force.
Step 4: Inspect Surrounding Parts
Installing a new shaft is a great opportunity to assess the condition of surrounding components.
Check Bearings, Bushings, and Mounts
Replace worn bearings or bushings to prevent premature wear on your new shaft.
Clean Internal Areas
Remove dust, adhesive residue, or packaging debris. A clean workspace supports smoother operation.
Evaluate Alignment of Connected Components
Misaligned pulleys or gears can damage your new shaft over time.
Step 5: Prepare the New Wexxar Shaft 21-046
Before inserting the replacement shaft, confirm that it is ready for installation.
Verify Part Authenticity
Ensure the new shaft matches OEM specifications. Using authentic Wexxar Packaging components maintains machine integrity.
Clean the Shaft Surface
Wipe the shaft lightly with a clean cloth to remove any oil residue from manufacturing or storage.
Lubricate Only if Recommended
Some Wexxar models require a light application of machine-safe lubricant. Follow the guidance in your equipment manual.
Step 6: Install the New Shaft
This is the most important step for ensuring smooth motion and long-term reliability.
Align the Shaft Properly
Guide the new shaft through its housing, ensuring it fits straight without forcing.
Reconnect Gears, Pulleys, or Rollers
Slide each component into its designated position along the shaft, ensuring alignment marks match.
Tighten Set Screws and Bolts Securely
Fasten all retaining points using the correct torque settings when specified.
Step 7: Check Alignment and Rotation
Once the shaft is installed, test it manually before reassembling the guards.
Rotate the Shaft by Hand
It should turn smoothly without grinding or resistance.
Verify Gear and Belt Alignment
Misalignment can lead to premature wear, noise, or machine stoppages.
Confirm Clearance
Ensure no components rub against the frame or against each other.
Conclusion
The Wexxar Shaft 21-046 is a vital component in maintaining smooth, reliable packaging operations. With careful installation, proper alignment, and consistent maintenance, operators can maximize machine efficiency and protect the surrounding drive system. Partnering with trusted Wexxar Packaging suppliers and using high-quality packaging equipment and parts ensures your equipment continues performing at its best—minimizing downtime and keeping your production line running strong.