Let’s be honest. While everyone discusses hydration ratios and flour kinds, relatively few people bring up proofing baskets. Big error. Using proofing baskets isn’t just about looks — it’s about structure, air flow, and that crust you dream about. Your dough is not merely resting when it is proofed in a bread basket. It’s forming. expanding. obtaining the surface tension that, when exposed to oven heat, keeps everything together. If you skip the basket, the dough may lose its guts and flatten. When you use it, you’ll be baking like a pro.
What Exactly Is a Proofing Basket Anyway?
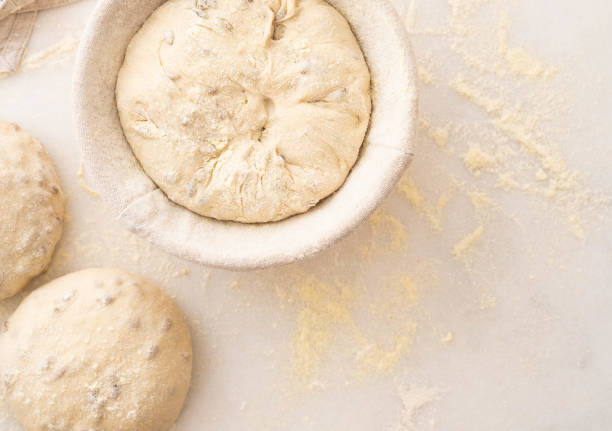
If you’ve never seen one, it’s simple. A proofing basket — or banneton — is basically a coiled cane or rattan bowl that holds your dough while it rises. Some are linen-lined, some naked. The idea is to give the dough a place to breathe while supporting its shape. The spiral pattern? Not just pretty. It lets the dough release moisture evenly, keeping the crust thin but crisp. Using proofing baskets helps your loaf keep that beautiful dome shape. No more pancake-shaped “bread disasters.”
Why Shape Matters More Than You Think
Shape affects everything. How your bread rises. How it bakes. Even how it tastes. Without proper proofing, your loaf might collapse or bake unevenly. The bread basket for proofing keeps things tight — like a gentle hug for your dough. That surface tension you get when the dough presses against the basket sides? That’s gold. It traps gas, builds strength, and makes that oven spring (when the bread puffs up in the oven) explosive. Yeah, that’s what you want.
Linen or Bare? The Great Proofing Basket Debate
So, you’ve got options. Some bakers swear by linen-lined baskets — they keep the dough from sticking. Others go bare, dusting their rattan with rice flour to keep things dry. Personally? I mix it up. Wet doughs love linen. Stiffer ones can go straight in the raw basket. There’s no “one right way.” The trick is figuring out what your dough likes best. Using proofing baskets becomes second nature once you play around a bit. You’ll start to notice patterns — how different flours behave, how hydration changes the rise.
Don’t Skip the Dusting (You’ll Regret It)
You ever peel your dough out of a basket only to have half of it stick? Yeah, I’ve been there. Nightmare. Always — always — dust the inside of your bread basket for proofing. Use rice flour if you can. It’s less likely to absorb into the dough. A little cornstarch can help too. The goal isn’t to cake it on but to make sure your dough slides out easy. Nothing kills your mood faster than ripping a beautiful loaf right before baking.
The Science Behind the Rise
Alright, let’s geek out for a second. When dough sits in a proofing basket, the coiled shape helps wick moisture away from the outer layer. That forms a slight “skin.” Sounds weird, but that skin becomes your crust later. It also traps gases inside, so your dough stays strong and full of life. Using proofing baskets basically helps control fermentation in a natural, predictable way. No guessing. You know what your dough will do next. It’s structure and science, all in one handmade tool.
Proofing Baskets vs. Mixing Bowls — No Contest
Sure, you could proof your dough in a regular bowl. People do it all the time. But it’s like comparing a cheap motel bed to a good night’s sleep in your own home. Using a bread basket for proofing gives your dough space to stretch without losing shape. Bowls trap too much moisture and can make your dough sticky. Baskets let it breathe. Plus, that gentle imprint from the coils? That’s your signature. The mark that says, “Yeah, this bread was made by hand.”
How to Clean and Care for Your Baskets
Listen, proofing baskets aren’t high maintenance — but they do need love. Never soak them. Just brush out any leftover flour once they’re dry. If you get dough stuck inside, let it dry out first, then scrub it gently. Every few weeks, give your bread basket a short sunbath. That’s right — let it sit in the sun to kill off any yeast or bacteria. Simple, effective, and no chemicals needed. A good basket lasts for years if you treat it right.
The Aesthetic Bonus Nobody Talks About
Let’s be honest — using proofing baskets also makes your bread look like something out of an artisan bakery. Those spiral ridges? They’re not just functional; they’re beautiful. You can dust your dough before baking for a rustic, cracked look. Or score it deeply for dramatic contrast. Either way, it’s bread that looks alive. People will think you’ve been baking for decades. Presentation might not change the flavor, but it sure changes how people feel when they see it.
Common Mistakes New Bakers Make
Here’s where most beginners trip up: over-proofing, under-dusting, and ignoring the dough’s feel. Using proofing baskets helps a ton, but it’s not magic. You’ve got to learn your dough. Too long in the basket, and it collapses. Not long enough, and it tears open weirdly. Trust your instincts more than the clock. Give it a gentle poke — if it springs back slowly, you’re good. Also, don’t forget to flip it confidently onto your baking surface. Hesitation makes messes. Be bold.
Real Talk: The Difference You’ll Taste
This isn’t just about pretty loaves. Using proofing baskets actually changes how your bread tastes. That improved structure helps the dough ferment evenly, creating a deeper, nuttier flavor. The crust gets thinner, crispier. The crumb — that’s the inside — becomes soft but structured. You know that satisfying chew you get in good sourdough? That’s proofing done right. Every baker I know who finally switches to baskets says the same thing: “Why didn’t I do this sooner?”
Ready to Bake Like a Pro?
If you’ve been making bread for a while but haven’t tried using proofing baskets, now’s the time. They’re cheap, durable, and change the whole game. You’ll start getting that tall rise, that perfect texture. You’ll feel like your kitchen’s a real bakery. So stop overthinking it — grab a bread basket for proofing and give your next loaf the treatment it deserves.
And when you’re ready to level up your bread game even more, visit Abioto Baking — where you’ll find everything from proofing baskets to artisan tools that make your homemade bread sing.
FAQs: Using Proofing Baskets & Bread Baskets for Proofing
Q1: Do I really need a proofing basket to bake bread?
Technically, no. But if you want consistent shape, texture, and rise — yes, you need one. Using proofing baskets keeps dough supported while it grows, giving it professional-level structure.
Q2: What’s the best flour to dust my proofing basket with?
Rice flour. It’s the top choice because it doesn’t get absorbed easily. You can mix it with all-purpose flour for extra coverage.
Q3: Can I use a towel or bowl instead of a bread basket for proofing?
Sure, but it’s not the same. Towels hold moisture and bowls don’t breathe. Baskets help your dough develop a skin — the foundation of that crisp crust.
Q4: How long can dough sit in a proofing basket?
Depends on temperature and recipe, but usually 1–3 hours at room temp or overnight in the fridge. Just don’t overproof — it’ll lose shape fast.
Q5: How do I clean my proofing basket after baking?
Let any dough dry, then brush it out with a stiff brush. Never use soap or water. A short sun-dry helps kill bacteria naturally.
Q6: Do proofing baskets work for all types of bread?
Absolutely. Sourdough, whole wheat, rye — they all benefit. Just adjust the basket size to match your dough weight.
Q7: Why is my dough sticking even with flour?
Your dough might be too wet, or you didn’t dust enough. Try rice flour or a linen liner. Once you find the right combo, sticking problems vanish.
Q8: What’s the difference between rattan and plastic proofing baskets?
Rattan is traditional and gives better airflow. Plastic works fine for beginners but doesn’t draw moisture away as effectively. Go natural if you can.
Q9: Can I put the dough straight from the fridge into the oven?
Yes, many bakers do that for better oven spring. Just make sure it’s proofed enough before chilling.
Q10: Where can I get high-quality proofing baskets and baking tools?
For sturdy, well-crafted proofing baskets and everything you need to bake better bread, visit Abioto Baking — your go-to source for real baking essentials.